アプリでアニメーション実装がはかどる「MotionLayout」のススメ~エンジニアが語る技術愛 #7~
ミクシィには、探究心溢れるエンジニアがたくさん在籍しています。
その探究心は業務で扱う技術に留まらず、趣味で書いているプログラムだったり、個人的に研究している言語だったりと、自身の気になった技術への追求も留まることを知りません。
そこで、社内のエンジニアに“好きな技術”について、思う存分に語ってもらうシリーズを始めました。
ルールはこの通り。
・業務で使っている技術でも、使われていない技術でもOK
・あくまでも個人的な見解で
・その技術のどこが面白いの
・愛を込めて語り尽くしてもらう
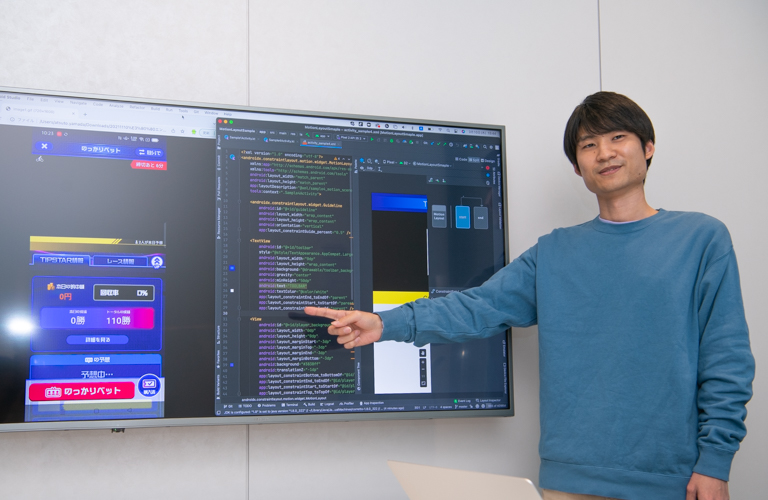
第7回目は、『TIPSTAR』のAndroidアプリ開発チームのテックリードを担当している山田に、「MotionLayout」の魅力をたっぷり語ってもらいました。

サービスを実現するための「MotionLayout」
━━山田さんが探求されている「MotionLayout」はどのような技術ですか?
「MotionLayout」は、Androidアプリにおける複雑なViewのアニメーションも管理できるViewGroupです。
━━Viewのアニメーション管理ですか。
ええ。例えば、『TIPSTAR』におけるViewアニメーションを実現するために利用している技術でもあります。『TIPSTAR』はAndroidアプリの中ではViewアニメーションを多用しているアプリ。開発前段階から図のようなアニメーションを導入したいという話を受けていました。
━━かなり複雑なアニメーションが使われていますよね。
そうなんです。今回は「MotionLayout」が何なのか、と基本的な使い方を紹介し、なぜこの技術をアプリへの導入に選択したかということについてお話しができればと思っています。まずは、AndroidにおけるViewアニメーションを実現する方法とそれぞれの特徴についてお話しをさせていただきますね。
━━わかりました。では早速、「MotionLayout」でできることとは?
AndroidにおけるViewアニメーションの実現方法と各特徴について、以下が挙げられます。
○初期からある機能
○単一のViewの見た目の変化をXMLリソースで表現する
○見た目だけが変化し、実際のレイアウト上では変更が発生しない
○変化させられるプロパティが限られている
○Android 3.0から追加
○単一のView(または任意のオブジェクト)の任意のプロパティの変化をXMLまたはコード上で表現する
○実際のプロパティを変更できるため、見た目だけではなく実際のレイアウト上でも変更が行われる
○AndroidX ConstraintLayout 2.0からサポート
○ConstraintLayout内の複数のViewの状態をXMLリソースで表現する
○アニメーションの前と後の制約をそれぞれ定義し、アニメーション前からアニメーション後の制約に至るまでの遷移を補完しながらアニメーションが表現される
『TIPSTAR』においては理想とするサービスを実現するために複数のViewのレイアウトを遷移する必要がありました。実現するため技術に一番近いものは何かと考えた時に「MotionLayout」だったんです。
━━「MotionLayout」のどのあたりが優れているのでしょうか。
従来のView AnimationやProperty Animationではアニメーション時の変化量、移動量を指定する形式だったため、アニメーション後のView位置に至るまでの変化量を計算する必要がありました。また、特に複数のViewを同時に動かした場合、各Viewとの位置関係がコード上から明らかではないためメンテナンス性も低下していました。MotionLayoutではアニメーション前、アニメーション後それぞれのViewの状態や位置を指定するだけで、アニメーション前からアニメーション後に至るまでの変化量、移動量を勝手に計算してくれるため実装が簡単になります。
━━この「MotionLayout」という技術と出会ったきっかけについて聞かせてください!
最初は2018年のGoogle I/Oの発表で知りました。当時は『TIPSTAR』の開発に参加していなかったため、ここまでアニメーションを多様することもないだろうと割とスルーしていました。『TIPSTAR』の開発に参加してから複雑なアニメーションを入れたいという話が出てきて、当時まだBeta版の段階で安定性の心配はありましたがメリットの方が大きいだろうということで「MotionLayout」の導入を決めました。
━━Beta版の技術を採用することがあるんですね!?
Android用のIDEであるAndroid StudioにMotionLayout用のエディター機能が入る動きなど、これから積極的に採用される動きがありました。Betaではありましたが、今後バグなどの問題点は解消されていくだろうと考えたため採用することになりました。
━━なるほど。次は「MotionLayout」の実例についてお伺いします。導入方法や基本的な実装など、詳細な部分を教えてください。
はい。まずは「MotionLayout」におけるアニメーション概念の説明から始めましょう。これから紹介する利用方法に出てくるコードは全てこちらにサンプルコードとしてアップロードされているので、参考にしてください。
- サンプルコードはこちら:https://github.com/mixigroup/MotionLayoutSampl
まず、アプリのGradle依存関係にConstraintLayout 2.0以上を追加する必要があります。最近新規で作成したプロジェクトであれば標準で追加されているため、変更の必要はありません。
app/build.gradle
https://github.com/mixigroup/MotionLayoutSample/blob/master/app/build.gradle#L39
dependencies {
 implementation 'androidx.constraintlayout:constraintlayout:2.1.2'
}
レイアウトとMotionScene
MotionLayoutはConstraintLayoutのサブクラスになっており、アニメーションを利用したいレイアウトのConstraintLayoutの置き換えとして利用します。ルートとしてandroidx.constraintlayout.motion.widget.MotionLayoutを指定します。ここでは、アニメーションにより動かしたい子Viewの制約を削除した状態にしておきます。ただし、アニメーションを必要としないViewに関しては、レイアウト内に制約を書くことができます。MotionLayoutの属性のlayoutDescriptionとして後述のMotionSceneが記述されたxmlリソースを指定します。この例ではTextView(id:sample_text)を動かす対象としています。
app/src/main/res/layout/activity_sample1.xml(一部省略)
https://github.com/mixigroup/MotionLayoutSample/blob/master/app/src/main/res/layout/activity_sample1.xml
<?xml version="1.0" encoding="utf-8"?>
<androidx.constraintlayout.motion.widget.MotionLayout
xmlns:android="http://schemas.android.com/apk/res/android"
 xmlns:app="http://schemas.android.com/apk/res-auto"
 xmlns:tools="http://schemas.android.com/tools"
 android:id="@+id/motion_layout"
 android:layout_width="match_parent"
 android:layout_height="match_parent"
 app:layoutDescription="@xml/sample1_motion_scene"
 tools:context=".Sample1Activity">

<TextView
         android:id="@+id/sample_text"
         style="@style/TextAppearance.AppCompat.Large"
         android:layout_width="0dp"
         android:layout_height="0dp"
         android:text="SAMPLE_TEXT" />
</androidx.constraintlayout.motion.widget.MotionLayout>
そして、MotionSceneが定義されたxmlリソースを作成します。
このMotionSceneでは、アニメーションによって変化させる各ステートにおける制約状態を記録するConstraintSet、アニメーションの動作トリガーやアニメーション時間を指定するTransitionを定義します。
ConstraintSetはアニメーションによって変化させたいステートをステートの数だけ定義します。(サンプルコードでは4つのステートを用意しています)Viewごとの制約はConstraintで定義します。サンプルコードのstate_0ではTextViewは左上に存在し、state_1では右上に存在していることになります。
Constraintによる定義はlayout_constraint…から始まる制約定義だけではなく、Viewのプロパティに対する値を定義することも可能です。サンプルコードでは、state_1の時にalphaを50%に変化させ、textColorを#3D3に変更するように定義しています。Constraintの属性として定義できるプロパティは限られておりドキュメントにある通り、alpha, visibility, elevation, rotationXY, translationXYZ, scaleXYのみとなります。その他のプロパティに関してはCustomAttributeを利用することで定義することができます。
Transitionではアニメーションの開始と終了のステートをconstraintSetEnd, constraintSetStartで指定します。また、durationによってアニメーション時間(ミリ秒)を指定できます。3つ以上のステートがある場合も、何かしらの開始と終了のステートを指定してください。これらは次セクションで解説するトリガーを利用したアニメーションにおいて利用することができます。
app/src/main/res/xml/sample1_motion_scene.xml(一部省略)
https://github.com/mixigroup/MotionLayoutSample/blob/master/app/src/main/res/xml/sample1_motion_scene.xml
   <Transition
       motion:constraintSetEnd="@id/state_1"
       motion:constraintSetStart="@id/state_0" />

   <ConstraintSet android:id="@+id/state_0">
       <Constraint
           android:id="@+id/sample_text"
           android:layout_width="wrap_content"
           android:layout_height="wrap_content"
           motion:layout_constraintStart_toStartOf="parent"
           motion:layout_constraintTop_toTopOf="parent">
           <CustomAttribute
               motion:attributeName="textColor"
               motion:customColorValue="#000" />
       </Constraint>
   </ConstraintSet>

   <ConstraintSet android:id="@+id/state_1">
       <Constraint
           android:id="@+id/sample_text"
           android:layout_width="wrap_content"
           android:layout_height="wrap_content"
           android:alpha="0.5"
           motion:layout_constraintEnd_toEndOf="parent"
           motion:layout_constraintTop_toTopOf="parent">
           <CustomAttribute
               motion:attributeName="textColor"
               motion:customColorValue="#3D3" />
       </Constraint>
   </ConstraintSet>
MotionLayout.transitionToStateで定義したステートを呼ぶことで、そのステート間の動きをアニメーションによって遷移することが可能になります。
app/src/main/java/jp/co/mixi/motionsample/Sample1Activity.kt
https://github.com/mixigroup/MotionLayoutSample/blob/master/app/src/main/java/jp/co/mixi/motionsample/Sample1Activity.kt
package jp.co.mixi.motionsample
import androidx.appcompat.app.AppCompatActivity
import android.os.Bundle
import android.widget.Button
import androidx.constraintlayout.motion.widget.MotionLayout
import androidx.constraintlayout.utils.widget.MotionLabel
class Sample1Activity : AppCompatActivity() {
サンプルコードではその他のステートも追加しているので、ぜひお試しください。
━━特定のアクションをトリガーとしてアニメーションを開始する方法もあるんですか?
はい、あります。以下のようなレイアウトを例に解説します。
app/src/main/res/layout/activity_sample2.xml
https://github.com/mixigroup/MotionLayoutSample/blob/master/app/src/main/res/layout/activity_sample2.xml
<?xml version="1.0" encoding="utf-8"?>

<androidx.constraintlayout.motion.widget.MotionLayout xmlns:android="http://schemas.android.com/apk/res/android"
   xmlns:app="http://schemas.android.com/apk/res-auto"
   xmlns:tools="http://schemas.android.com/tools"
   android:layout_width="match_parent"
   android:layout_height="match_parent"
   app:layoutDescription="@xml/sample2_motion_scene"
   tools:context=".Sample2Activity">

   <androidx.constraintlayout.widget.Guideline
       android:id="@+id/guideline"
       android:layout_width="wrap_content"
       android:layout_height="wrap_content"
       android:orientation="vertical"
       app:layout_constraintGuide_percent="0.5" />

   <TextView
       android:id="@+id/sample_text"
       style="@style/TextAppearance.AppCompat.Large"
       android:layout_width="0dp"
       android:layout_height="0dp"
       android:background="#AAA"
       android:gravity="center"
       android:text="SAMPLE_TEXT" />

</androidx.constraintlayout.motion.widget.MotionLayout>
アニメーションを開始するトリガーを追加するには、MotionSceneのTransition内にOnSwipeまたはOnClickを追加します。下の例ではTransition内にOnSwipeを追加しています。これによりスワイプ時にアニメーションを開始することが可能です。OnSwipe, OnClickそれぞれの属性としては以下のものを指定できます。
■OnSwipe
○touchAnchorId
●アニメーションの変化量を計算する基準のViewを指定
○touchAnchorSide
●アニメーションの変化量を計算するポイントを指定(bottomであればViewの下端)
○dragDirection
●スワイプする方向を指定
■OnClick
○targetId
●クリックするViewを指定
○clickAction
●クリック時に発生するアクションの種類
▼toggle: 開始/終了ステートをアニメーションで切り替え
▼transitionToStart: 開始ステートまでアニメーション
▼transitionToEnd: 終了ステートまでアニメーション
▼jumpToStart: 開始ステートに切り替え(アニメーションなし)
▼jumpToEnd: 終了ステートに切り替え(アニメーションなし)
app/src/main/res/xml/sample2_motion_scene.xml
https://github.com/mixigroup/MotionLayoutSample/blob/master/app/src/main/res/xml/sample2_motion_scene.xml
<?xml version="1.0" encoding="utf-8"?>
<MotionScene xmlns:android="http://schemas.android.com/apk/res/android"
   xmlns:motion="http://schemas.android.com/apk/res-auto">

   <Transition
       motion:constraintSetEnd="@id/end"
       motion:constraintSetStart="@id/start">
       <OnSwipe
           motion:dragDirection="dragUp"
           motion:touchAnchorId="@id/sample_text"
           motion:touchAnchorSide="bottom" />
   </Transition>

   <ConstraintSet android:id="@+id/start">
       <Constraint
           android:id="@+id/sample_text"
           android:layout_width="0dp"
           android:layout_height="0dp"
           motion:layout_constraintDimensionRatio="h,16:9"
           motion:layout_constraintEnd_toEndOf="parent"
           motion:layout_constraintStart_toStartOf="parent"
           motion:layout_constraintTop_toTopOf="parent" />
   </ConstraintSet>

   <ConstraintSet android:id="@+id/end">
       <Constraint
           android:id="@+id/sample_text"
           android:layout_width="0dp"
           android:layout_height="0dp"
           motion:layout_constraintDimensionRatio="h,16:9"
           motion:layout_constraintEnd_toEndOf="@id/guideline"
           motion:layout_constraintStart_toStartOf="parent"
           motion:layout_constraintTop_toTopOf="parent" />
   </ConstraintSet>

</MotionScene>
このサンプルを実行すると下のようになります。わずかなコードだけでもリッチなアニメーションを実現できていることが分かると思います。
━━なるほど。少ないコードでも豊富なリッチ表現ができるようになるわけですね。
ええ。次に、前セクションの応用でRecyclerViewのスクロールと合わせてアニメーションを行う方法を解説します。OnSwipeによるアニメーションでは、スクロール可能なViewと組み合わせて利用することができます。ただしスクロール可能なViewはMotionLayoutの子Viewである必要があります。
━━具体的には。
先程のサンプルのレイアウトに追加でRecyclerViewを置きます。
app/src/main/res/layout/activity_sample3.xml
https://github.com/mixigroup/MotionLayoutSample/blob/master/app/src/main/res/layout/activity_sample3.xml
<?xml version="1.0" encoding="utf-8"?>
<androidx.constraintlayout.motion.widget.MotionLayout xmlns:android="http://schemas.android.com/apk/res/android"
   xmlns:app="http://schemas.android.com/apk/res-auto"
   xmlns:tools="http://schemas.android.com/tools"
   android:layout_width="match_parent"
   android:layout_height="match_parent"
   app:layoutDescription="@xml/sample3_motion_scene"
   tools:context=".Sample3Activity">

   <androidx.constraintlayout.widget.Guideline
       android:id="@+id/guideline"
       android:layout_width="wrap_content"
       android:layout_height="wrap_content"
       android:orientation="vertical"
       app:layout_constraintGuide_percent="0.5" />

   <TextView
       android:id="@+id/sample_text"
       style="@style/TextAppearance.AppCompat.Large"
       android:layout_width="0dp"
       android:layout_height="0dp"
       android:background="#AAA"
       android:gravity="center"
       android:text="SAMPLE_TEXT" />

   <androidx.recyclerview.widget.RecyclerView
       android:id="@+id/recycler_view"
       android:layout_width="0dp"
       android:layout_height="0dp"
       android:background="#CDC"
       app:layoutManager="androidx.recyclerview.widget.LinearLayoutManager" />

</androidx.constraintlayout.motion.widget.MotionLayout>━━これによって画面にリスト形式のViewが配置されたのですね。
そうですね。次にMotionSceneを定義します。RecyclerViewはTextViewの下部に位置するように指定しました。RecyclerViewのスクロールによってアニメーションを変化させたいため、OnSwipeの定義でtouchAnchorIdとしてRecyclerView(id:recycler_view)を指定し、touchAnchorSideにtopを指定することでRecyclerViewの上端を基準にアニメーションを変化させるように指定します。
app/src/main/res/xml/sample3_motion_scene.xml
https://github.com/mixigroup/MotionLayoutSample/blob/master/app/src/main/res/xml/sample3_motion_scene.xml
<?xml version="1.0" encoding="utf-8"?>
<MotionScene xmlns:android="http://schemas.android.com/apk/res/android"
   xmlns:motion="http://schemas.android.com/apk/res-auto">

   <Transition
       motion:constraintSetEnd="@id/end"
       motion:constraintSetStart="@id/start">
       <OnSwipe
           motion:dragDirection="dragUp"
           motion:touchAnchorId="@id/recycler_view"
           motion:touchAnchorSide="top" />
   </Transition>

   <ConstraintSet android:id="@+id/start">
       <Constraint
           android:id="@+id/sample_text"
           android:layout_width="0dp"
           android:layout_height="0dp"
           motion:layout_constraintDimensionRatio="h,16:9"
           motion:layout_constraintEnd_toEndOf="parent"
           motion:layout_constraintStart_toStartOf="parent"
           motion:layout_constraintTop_toTopOf="parent" />
       <Constraint
           android:id="@+id/recycler_view"
           android:layout_width="0dp"
           android:layout_height="0dp"
           motion:layout_constraintBottom_toBottomOf="parent"
           motion:layout_constraintEnd_toEndOf="parent"
           motion:layout_constraintStart_toStartOf="parent"
           motion:layout_constraintTop_toBottomOf="@id/sample_text" />
   </ConstraintSet>

   <ConstraintSet android:id="@+id/end">
       <Constraint
           android:id="@+id/sample_text"
           android:layout_width="0dp"
           android:layout_height="0dp"
           android:layout_marginStart="10dp"
           android:layout_marginTop="10dp"
           android:layout_marginEnd="10dp"
           android:rotationY="180"
           motion:layout_constraintDimensionRatio="h,16:9"
           motion:layout_constraintEnd_toEndOf="@id/guideline"
           motion:layout_constraintStart_toStartOf="parent"
           motion:layout_constraintTop_toTopOf="parent" />
       <Constraint
           android:id="@+id/recycler_view"
           android:layout_width="0dp"
           android:layout_height="0dp"
           android:layout_marginTop="10dp"
           motion:layout_constraintBottom_toBottomOf="parent"
           motion:layout_constraintEnd_toEndOf="parent"
           motion:layout_constraintStart_toStartOf="parent"
           motion:layout_constraintTop_toBottomOf="@id/sample_text" />
   </ConstraintSet>

</MotionScene>
このサンプルを実行すると、下のようになります。RecyclerView自体のスクロールを維持しながらも、MotionLayout内のアニメーションを変化させることが可能になっています。
━━こんな複雑な動きも可能なんですね。
はい。RecyclerView自体のスクロールを維持しながらも、「MotionLayout」内のアニメーションを変化させることが可能になっています。最後に、『TIPSTAR』においてのアニメーション動作を再現してみようと思います。
━━サービスの実例で。
まずは下図のようなレイアウトを用意します。最終的に矢印が入るImageView(id:icon)をタップすることで動画部分(id:player)が縮小するようなアニメーションを作りたいと思います。動画の枠線として利用するView(id:player_background)がマイナスマージンで追加されているのがポイントになります。
app/src/main/res/layout/activity_sample4.xmlhttps://github.com/mixigroup/MotionLayoutSample/blob/master/app/src/main/res/layout/activity_sample4.xml
<?xml version="1.0" encoding="utf-8"?>
<androidx.constraintlayout.motion.widget.MotionLayout xmlns:android="http://schemas.android.com/apk/res/android"
   xmlns:app="http://schemas.android.com/apk/res-auto"
   xmlns:tools="http://schemas.android.com/tools"
   android:layout_width="match_parent"
   android:layout_height="match_parent"
   app:layoutDescription="@xml/sample4_motion_scene"
   tools:context=".Sample4Activity">

   <androidx.constraintlayout.widget.Guideline
       android:id="@+id/guideline"
       android:layout_width="wrap_content"
       android:layout_height="wrap_content"
       android:orientation="vertical"
       app:layout_constraintGuide_percent="0.5" />

   <TextView
       android:id="@+id/toolbar"
       style="@style/TextAppearance.AppCompat.Large"
       android:layout_width="0dp"
       android:layout_height="wrap_content"
       android:background="@drawable/toolbar_background"
       android:gravity="center"
       android:minHeight="50dp"
       android:text="TOOLBAR"
       android:textColor="@color/white"
       app:layout_constraintEnd_toEndOf="parent"
       app:layout_constraintStart_toStartOf="parent"
       app:layout_constraintTop_toTopOf="parent" />

   <View
       android:id="@+id/player_background"
       android:layout_width="0dp"
       android:layout_height="0dp"
       android:layout_marginStart="-3dp"
       android:layout_marginTop="-3dp"
       android:layout_marginEnd="-3dp"
       android:layout_marginBottom="-3dp"
       android:background="#3838ff"
       android:translationZ="-1dp"
       app:layout_constraintBottom_toBottomOf="@id/player"
       app:layout_constraintEnd_toEndOf="@id/player"
       app:layout_constraintStart_toStartOf="@id/player"
       app:layout_constraintTop_toTopOf="@id/player" />

   <ImageView
       android:id="@+id/player"
       android:layout_width="0dp"
       android:layout_height="0dp"
       android:background="@color/black"
       android:src="@drawable/ic_baseline_play_arrow_24" />

   <TextView
       android:id="@+id/team_comment"
       style="@style/TextAppearance.AppCompat.Large"
       android:layout_width="0dp"
       android:layout_height="0dp"
       android:background="#ffeb37"
       android:gravity="center"
       android:minHeight="36dp"
       android:text="COMMENT" />

   <ImageView
       android:id="@+id/icon"
       android:layout_width="0dp"
       android:layout_height="0dp" />

</androidx.constraintlayout.motion.widget.MotionLayout>
次にMotionSceneを定義します。Transitionの中にはOnClickを指定し、targetIdとしてImageView(id:icon)、clickActionにtoggleを指定することでImageViewをクリックすると開始ステートと終了ステートを交互にアニメーションできるようにします。また、ImageView(id:icon)には開始ステートでは上矢印(ic_baseline_arrow_circle_up_24)、終了ステートでは下矢印(ic_baseline_arrow_circle_down_24)を表示するためにImageView(id:icon)のConstraintにCustomAttributeを追加しています。通常ImageViewにレイアウトXML上で画像を設定するにはandroid:srcを利用するため、attributeNameにはsrcを指定したくなります。しかし、MotionLayoutはattributeNameを解決する際XML Attributeではなく、クラスのゲッター(Getter)とセッター(Setter)で解決を行います。ImageViewにコード上で画像を設定するためにはImageView.setImageResourceを利用するため、ここではsetImageResourceからsetを抜いたimageResourceを指定するのが正解になります。
app/src/main/res/xml/sample4_motion_scene.xml
https://github.com/mixigroup/MotionLayoutSample/blob/master/app/src/main/res/xml/sample4_motion_scene.xml
<?xml version="1.0" encoding="utf-8"?>
<MotionScene xmlns:android="http://schemas.android.com/apk/res/android"
   xmlns:motion="http://schemas.android.com/apk/res-auto">

   <Transition
       motion:constraintSetEnd="@id/end"
       motion:constraintSetStart="@id/start"
       motion:duration="300">
       <OnClick
           motion:clickAction="toggle"
           motion:targetId="@id/icon" />
   </Transition>

   <ConstraintSet android:id="@+id/start">
       <Constraint
           android:id="@+id/player"
           android:layout_width="0dp"
           android:layout_height="0dp"
           motion:layout_constraintDimensionRatio="h,16:9"
           motion:layout_constraintEnd_toEndOf="parent"
           motion:layout_constraintStart_toStartOf="parent"
           motion:layout_constraintTop_toBottomOf="@id/toolbar" />
       <Constraint
           android:id="@+id/team_comment"
           android:layout_width="0dp"
           android:layout_height="wrap_content"
           motion:layout_constraintEnd_toEndOf="parent"
           motion:layout_constraintStart_toStartOf="parent"
           motion:layout_constraintTop_toBottomOf="@id/player" />
       <Constraint
           android:id="@+id/icon"
           android:layout_width="48dp"
           android:layout_height="48dp"
           android:layout_marginEnd="24dp"
           motion:layout_constraintEnd_toEndOf="parent"
           motion:layout_constraintTop_toBottomOf="@id/team_comment">
           <CustomAttribute
               motion:attributeName="imageResource"
               motion:customReference="@drawable/ic_baseline_arrow_circle_up_24" />
       </Constraint>
   </ConstraintSet>

   <ConstraintSet android:id="@+id/end">
       <Constraint
           android:id="@+id/player"
           android:layout_width="0dp"
           android:layout_height="0dp"
           android:layout_marginStart="23dp"
           android:layout_marginTop="7dp"
           android:layout_marginEnd="23dp"
           motion:layout_constraintDimensionRatio="h,16:9"
           motion:layout_constraintEnd_toEndOf="@id/guideline"
           motion:layout_constraintStart_toStartOf="parent"
           motion:layout_constraintTop_toBottomOf="@id/toolbar" />
       <Constraint
           android:id="@+id/team_comment"
           android:layout_width="0dp"
           android:layout_height="wrap_content"
           android:visibility="invisible"
           motion:layout_constraintEnd_toEndOf="parent"
           motion:layout_constraintStart_toStartOf="parent"
           motion:layout_constraintTop_toBottomOf="@id/player" />
       <Constraint
           android:id="@+id/icon"
           android:layout_width="48dp"
           android:layout_height="48dp"
           android:layout_marginTop="7dp"
           android:layout_marginEnd="24dp"
           motion:layout_constraintEnd_toEndOf="parent"
           motion:layout_constraintTop_toBottomOf="@id/player">
           <CustomAttribute
               motion:attributeName="imageResource"
               motion:customReference="@drawable/ic_baseline_arrow_circle_down_24" />
       </Constraint>
   </ConstraintSet>

</MotionScene>
このサンプルを実行すると、下図のようになります。
ImageViewをトリガーとして開始ステートと終了ステートをアニメーションで切り替えができていると思います。終了ステートでは動画領域が縮小されますが、動画領域を囲う枠線(id:player_background)が動画領域に対してマイナスマージンで指定しているため、うまく枠線として機能していると思います。
━━山田さんは実際にこの『TIPSTAR』のアニメーション動作を作られたんですよね。苦労したところや頑張ったところなどはありますか?
アニメーションを追加したところ元のコードと相性が悪くそのままではうまく動かなくて、その原因追求が大変でした。結局大本のソースをしっかり読む必要がありました。
━━最後に。今後「MotionLayout」で挑戦してみたいこと、また挑戦したい技術などがあれば教えてください!
「MotionLayout」を使った機能は一通りできたので、一旦は満足していますね。Androidの技術でジャンルは異なるのですが、Coroutines Flowに関心を持っています。データのやりとりについてやり方を変えようと思っていてそのあたりに着目しています。